Beam and Brightness
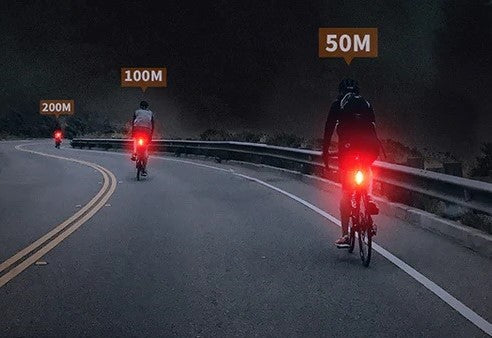
The brightness of a bike light is an important factor to consider when choosing the right one for your needs. A brighter light will provide better visibility and increase your safety while riding. The brightness of a bike light, just like most other lights, is measured in lumens. And most bike lights range in brightness from around 100 lumens to 1000 lumens or more. A light of 100-200 lumens is suitable for basic commuting or leisure riding in well-lit areas. A light of 300-500 lumens is better for commuting in urban environments or off-road riding on trails. A light of 500-1000 lumens or more is best for mountain biking or other high-intensity activities where visibility is critical.In addition to the overall brightness of the light, it is also important to consider the beam angle or how much area is illuminated. A wide beam angle is better for urban riding or other situations where you need to be seen from multiple angles. A focused beam is better for off-road riding or other activities where you need to see a specific area in front of you. Most bike lights come with adjustable beam angles so that you can choose the right setting for your needs.
Modes
Bike lights typically come with different modes that allow you to adjust the brightness and flashing patterns depending on your riding conditions. The most common modes on bike lights include steady, flashing, and pulsing.The steady mode is the most basic and provides a constant light beam. It is best used for well-lit roads or during the day. The flashing mode is more attention-grabbing and is useful for increasing visibility in busy or urban areas. The pulsing mode is most preferred, which is a combination of the steady and flashing modes. It provides a steady beam of light that periodically flashes.
Installation and removal
Installation and removal are essential factors you must consider before purchasing a bike light. An ideal bike light should be easy to install and remove. Generally, the first step in installing a bike light is to attach the bracket to the handlebars or seat post using the included hardware. This typically involves tightening a few bolts or screws to secure the bracket. Once the bracket is attached, you can then attach the light itself. Most bike lights have a simple clip or other mechanism that allows you to attach and detach the light from the bracket easily.Removing a bike light is a similar process. Start by loosening the bolts or screws that hold the bracket in place, and then slide the light off the bracket. If the light is attached to the bracket with a clip or other mechanism, you may need to undo this first before sliding the light off the bracket.
Charging
The other important factor to consider when choosing a bike light, is how easy it is to recharge. Most bike lights come with rechargeable batteries, which can save money and reduce waste compared to disposable batteries. However, the charging process and time can vary significantly between different lights.So the first thing to look for is the charging port. Some lights come with a micro-USB port, which allows you to recharge the light using a standard phone charger or other USB devices. Other lights come with a proprietary charging port, which may require a special cable or adapter to recharge. The advantage of a micro-USB port is that it is widely available and allows you to recharge the light using a variety of devices. A proprietary charging port is, however, preferred because it's more convenient and provides a faster charging time.
Then charging time. Some lights can be fully charged in as little as one hour, while others may take several hours to recharge. If you plan to use your light for extended periods, such as on long rides or overnight, you will want to choose a light with a shorter charging time. Additionally, some lights come with additional battery options, such as the ability to use disposable batteries in addition to rechargeable ones, which can be useful for longer rides or in case of emergency.
Battery life
The battery life is the time it can operate on a single charge. Longer battery life is important for extended rides or overnight adventures, as it ensures you will have enough light to see and be seen. The battery life is typically measured in hours and can range from a few hours to several days. A light with a battery life of 4-6 hours is suitable for basic commuting or leisure riding. A light with a battery life of 8-12 hours is better for longer rides or overnight adventures. A light with a battery life of 24 hours or more is best for extended trips or extreme conditions.Waterproofing and impact resistance
When choosing a bike light, it is important to consider the durability of the light. Since bike lights are exposed to the elements, it is essential to choose a light that is both impacts resistant and waterproof. Impact resistance refers to the ability of the light to withstand impact from bumps, drops, or other accidents. Waterproofing, on the other hand, is the ability of the light to operate in wet conditions without being damaged.One way to determine the durability of a bike light is to look for its IP rating. A light with an IP rating of IP65 or higher is considered waterproof and can be used in wet conditions without damaging the light. By choosing a light with a high IP rating and durable materials, you can ensure that your light can withstand the rigors of biking in any condition.


